In this post we will cover how to build your own derivative based on any Linux distribution, but we will be using Xubuntu 20.04 in this post as an example. I’ll not cover how to make your own Linux distribution from scratch, if you want to do that check out Linux From Scratch (or tldrlfs). There are many ways to customise a Linux distribution, in this post we will only cover one way, which is by customising the live CD.
Some of the reasons why you might want to create your own Linux distribution are:
- For having a system customised to your liking whenever you need to reformat your computer, and having a post-installation script is just boring.
- You are at a company/school/organisation and you have to have applications setup in a specific way (and preseeding the installer is not enough).
- Create a modern version of Hannah Montana Linux.
- You are bored due to the quarantine and want to do something.
I assume that you will be sensible and responsible to the distribution you are willing to fork, and to its community. Ubuntu owns the trademark to their names, so you cannot use their trademark in your derivative1. Be sure to familiarise yourself with the policy and guidelines of the distribution you are willing to use.
Prerequisites
It is important to know which kind of distribution you are deriving from, some
distributions such as Arch Linux are bootstrapped using their package manager.
This requires you to create your own mirror with your own version of the base
package. Newer distributions have build scripts available which allows you to
customise the installation image2. Modifying these distributions ISO files
will only change the live CD environment, which may not be what you want.
Our focus is customising Xubuntu 20.04, as Ubuntu and Ubuntu-based
distributions are easy to customise. The Ubuntu installer uses the ISO files,
so the customisations made to the ISO image will be applied to the installed
system. Before we continue, make sure you have the following packages on your
system: proot, squashfs-tools, rsync, qemu, and xorriso. We can then
download the Xubuntu ISO we want to
customise. There are many Ubuntu-specific parts in the following scripts, I’ll
note these so you may adapt it to whatever distribution your are customising.
Writing the scripts
We will be automating building our distribution in a shell script, this makes
building our derivative reproducible. So let’s start with a basic script called
build.sh.
#!/bin/sh

# We define the global variables
BASEDIR=`pwd` # this is the base working directory, in case we need to go back to it
MOUNT="mnt" # this is the mount directory for the ISO file
EXTRACT="extract-cd" # this is where the ISO will be extracted to
CHROOT="edit" # this is where the root partition (squashfs) will be extracted to
ORIG_FILE="xubuntu-20.04-desktop-amd64.iso" # this is the file we will be customising
DIST_NAME="pinguOS"
DIST_FILE="$DIST_NAME-$(date +%Y%m%d).iso" # this is the final file

# We make sure that the ISO file exists before we continue
if [ ! -f $ORIG_FILE ]; then
	echo "The file ${ORIG_FILE} doesn't exist. Be sure to download it first."
	exit
fi

# We clean up the files from previous runs
rm -rf $CHROOT $EXTRACT $MOUNT

# Now we run the scripts
. ./scripts/extract.sh
. ./scripts/customise.sh
. ./scripts/build.sh
In our shell script, we are splitting the process in three steps.
- extract: We extract the contents of the ISO file.
- customise: We modify the extracted contents to our liking.
- build: We build a new ISO file based on the changes we have made.
Extracting the ISO
Let’s start with ./scripts/extract.sh.
# We make the mount directory and mount the ISO to it
mkdir $MOUNT $EXTRACT
mount -o loop xubuntu-18.04.1-desktop-amd64.iso $MOUNT
# Now we copy the ISO contents to our extract directory
rsync --exclude=/casper/filesystem.squashfs -a ${MOUNT}/ $EXTRACT
# The filesystem is in a read-only compressed filesystem which we need to extract
unsquashfs mnt/casper/filesystem.squashfs
mv squashfs-root $CHROOT
# We can now unmount and delete that directory
umount $MOUNT
rm -rf $MOUNT
Note: With other distributions you may have to slightly tweak the code
above, files such as filesystem.squash may be somewhere else with another
name.
Customising the files
This should extract the root file system in the directory ./edit. At this
stage we can run chroot on our ./edit directory, but we usually need to
mount --bind our system directories such as /dev, /proc, /sys, and
other files so the programs run properly in the chroot environment3. To
simplify this, we are going to use PRoot. Let’s write ./scripts/customise.sh.
proot \
	-R ${PWD}/${CHROOT}/ \
	-w / \
	-b /proc/ \
	-b /dev/ \
	-b /sys/ \
	-b /etc/resolv.conf \
	-0 \
	/bin/bash
PRoot will also automatically mount/unmount these directories (defined with
-b) in our chroot environment when we are done with it, which reduces the
hassle of manually mounting and unmounting these directories. We can now test
it out by running our build script as root.
# sh ./build.sh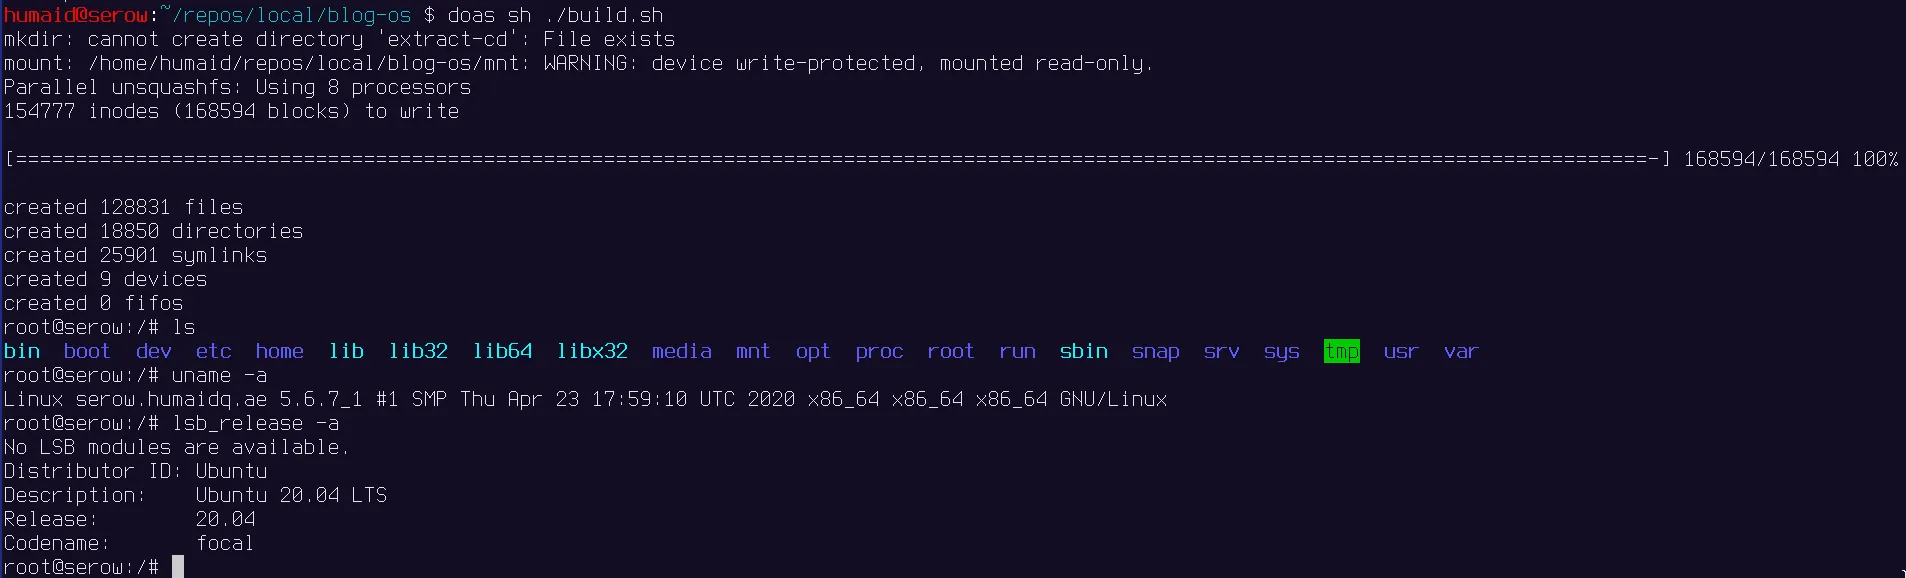
As you see in the screenshot, we get a prompt. This is the Xubuntu 20.04 environment which we can interact with and modify the system to our liking.
Let’s do something really simple, and add a hello world text file on the
desktop. On Linux, there is a directory called /etc/skel which contains
files that are automatically copied to new users on the system. Let’s append
this to ./scripts/customise.sh.
mkdir ${CHROOT}/etc/skel/Desktop
echo "Welcome to my Linux distribution" > ${CHROOT}/etc/skel/Desktop/hello.txt
We’ll add upon this file later to further customise our distribution, let’s now focus on building our new ISO image.
Building the new ISO file
Let’s write ./scripts/build.sh.
# we have to update the manifest file to contain the latest list of packages.
chmod +w $EXTRACT/casper/filesystem.manifest
proot \
	-R ${PWD}/${CHROOT}/ \
	-w / \
	-b /proc/ \
	-b /dev/ \
	-b /sys/ \
	-0 \
	dpkg-query -W --showformat='${Package} ${Version}\n' > $EXTRACT/casper/filesystem.manifest
cp $EXTRACT/casper/filesystem.manifest $EXTRACT/casper/filesystem.manifest-desktop
# we have to make a new squashfs compressed filesystem based on the changes we did
mksquashfs $CHROOT $EXTRACT/casper/filesystem.squashfs
# we put the size of the filesystem for casper
printf $(du -sx --block-size=1 edit | cut -f1) > $EXTRACT/casper/filesystem.size
# we also have to update the md5sum list of the files
cd $EXTRACT
rm md5sum.txt
find -type f -print0 | xargs -0 md5sum | grep -v isolinux/boot.cat > md5sum.txt
# now build the ISO
xorriso -as mkisofs \
	-r -V "$DIST_NAME amd64" \
	--protective-msdos-label \
	-b isolinux/isolinux.bin \
	-no-emul-boot -boot-load-size 4 -boot-info-table \
	--grub2-boot-info --grub2-mbr /usr/lib/grub/i386-pc/boot_hybrid.img \
	--efi-boot "boot/grub/efi.img" -efi-boot-part --efi-boot-image \
	-o ../$DIST_FILE .
cd $BASEDIR
Note: We do generate some files like the md5sum of the files, and the package listing. Some of these are based on Ubuntu’s live CD customisation guide and other sources4.
We can now try to build again, and try to boot it using qemu.
# sh ./build.sh
...
$ qemu-system-x86_64 -m 2G -cdrom pinguOS-<date>.iso
Violà!
Further customisations
There are still Xubuntu/Ubuntu branding which we have to change if we want to
redistribute our new fork. So let’s try to replace the branding with ours by
adding the following to the ./scripts/customise.sh file.
sed -i -e 's/Xubuntu/'$DIST_NAME'/g' $EXTRACT/isolinux/txt.cfg
sed -i -e 's/Xubuntu/'$DIST_NAME'/g' $EXTRACT/boot/grub/grub.cfg
sed -i -e 's/Xubuntu/'$DIST_NAME'/g' $EXTRACT/boot/grub/loopback.cfg
sed -i -e 's/Xubuntu 20.04 LTS "Focal Fossa"/'$DIST_NAME'/g' $EXTRACT/README.diskdefines
sed -i -e 's/Xubuntu/'$DIST_NAME'/g' $EXTRACT/boot/grub/grub.cfg
rm $EXTRACT/.disk/release_notes_url
echo -n "$DIST_NAME  - Release amd64 (`date +%Y%m%d`)" > $EXTRACT/.disk/info
echo '$DIST_NAME \n \l' > $CHROOT/etc/issue
echo '$DIST_NAME' > $CHROOT/etc/issue.net
echo > $CHROOT/etc/legal

# The lsb-release file
cat <<EOF> $CHROOT/etc/lsb-release
DISTRIB_ID=Ubuntu
DISTRIB_RELEASE=$(date +%Y%m%d)
DISTRIB_CODENAME=focal
DISTRIB_DESCRIPTION="$DIST_NAME"
EOF

# The os-release file
cat <<EOF> $CHROOT/etc/os-release
NAME="$DIST_NAME"
VERSION="$(date +%Y%m%d)"
ID=ubuntu
ID_LIKE=debian
PRETTY_NAME="$DIST_NAME"
VERSION_ID="$(date +%Y%m%d)"
HOME_URL="https://humaidq.ae/blog"
VERSION_CODENAME=focal
UBUNTU_CODENAME=focal
EOF
The sed commands basically does search and replace in the given files. And
other files such as the /etc/issue we completely overwrite. That’s most of
the files we need to modify. Now we might want to install our own packages or
run other commands. Let’s modify the proot command at the top of the
./scripts/customise.sh script.
proot \
	-R ${PWD}/${CHROOT}/ \
	-w / \
	-b /proc/ \
	-b /dev/ \
	-b /sys/ \
	-b /etc/resolv.conf \
	-0 \
	/bin/bash <<EOF

export HOME=/root
export LC_ALL=C

apt update
apt upgrade -y --allow-downgrades

# TODO: You might want to install/purge packages here, or add your PPA.
# You might want to remove the plymouth branded boot screen too.


apt autoremove --purge -y

EOF
Other places of interest may be:
/usr/lib/ubiquity: Installer Python source/usr/share/ubiquity-slideshow: Installer slideshow files/etc/update-motd.d: System message of the day
The possibilities are endless.
In the second part of this blog series we will be creating our custom Raspbian Lite image, which is slightly different as we are dealing with an image file with partitions rather than an ISO file.
Footnotes
-
Check Ubuntu’s DerivativeDistroHowto wiki page, it contains examples of some things you should and shouldn’t do. ↩
-
For example Alpine’s abuild or Void’s void-mklive. ↩
-
We mount these so that the applications which rely on the existence of these directories can work in the chroot environment. ↩
-
You can go into more detail at Ubuntu’s LiveCDCustomisation wiki page, but some information might be outdated. I have also learned from reading Pop!_OS ISO production source code, which filled some gaps. ↩